Monday, January 7, 2019

Happy Belated New Year, a look back at 2018

I apologize for my tardiness, this was supposed to be out last week, but I got sick again and couldn't leave the house.

Well here we are, my last post of 2018. I can hardly believe it, the time went by so quickly. I had to go back to my Ravelry projects to see what I worked on early this year.
I had a lot, a lot of UFOs from many, many years past and I decided it was time to tackle them. At least make some decisions on whether to rip, save or give away as is.


My back to school mittens that I started back in 2011, I decided to stop where I was. I had completed one mitten and made a thumb, that's all. The thumb I ripped and put the yarn into the appropriate box and the completed mitten I decided would be useful in my education demos, so in to the ed box it went.

I did this with each item I came across in a bag and most were ripped. I didn't give anything away in the UFO state. I still have many started and unfinished ideas around in all stages, thus goes the work of designer I suppose.

The projects I worked early in 2018 were Spring Leaves Returns, this was prep for a class I taught at the Estes Park Wool Market in June. 

Glory and I also started our Make It With Wool projects in March. This sweater and my Brioche shawl took most of my time at home. On the road I was working on socks and spindle spinning.

The one thing I really wanted to focus on in 2018 was time management and my social media. It took me until almost August to really get a handle on this and know how to apply it and use it, but I love it! Now that Christmas projects are finished I can't wait for the children to go back to school so that I can get into my normal routine again.

In my "schedule" I made time for each craft I wanted to do, the things I "have" to do and also time for learning and Spiritual growth as well. As you can see from the picture below of my one of my schedules, I switch activities often, this helps me to stay focused while on each activity, even if I'm at a place in it that is not as much fun, like the heel of a sock or the final section of tech editing.


I have 3 processing sessions each day. No not for processing stress and life, but for processing fiber. I am currently processing my lamb fleece, so that I can spin it for 2019 Make It WIth Wool. This helps my hands not get as tired and I don't get as board or distracted in the short interval. I have accomplished more in the last 4-5 months than I have in the last 2 years. If you are going to have a "schedule" you have to remember to be flexible and that it is only a guideline to keep you focused and get more done, NOT to cause stress.

Something I try to spend time on each week is weaving and I had fun with that this year. I wove only one thing, a large scarf. It was from some of my own hand spun and I learned so much. I talk more about that here.

My favorite finished project this year was this jacket.  I put a tassel on the hood a couple of weeks ago and I love this jacket.  This winter has been very mild for Colorado and I have gotten to wear it often.


The oldest UFO that I finished this year was a quilt that I pieced the top of back in 2010 or 11...  After we moved to the middle of nowhere I pieced the back and sewed the strips for the binding.  I've had the batting for about 2 years, it all just sat.  I decided to finish it for Christmas for my DH.  He loved it.  It is a log cabin quilt.  I tied it and only quilted the last border.  It is a queen size.
 

For my birthday I received a crocheted potholder from my best friend's mom. She is always talking about how she wished she could crochet better. When I saw the pot holder I started to laugh. She looked at me. I stopped laughing and explained that though I have tried and tried this is one pattern I have not yet been successful with. She sent me the link to the website she used. My friend helped me to download it to my phone so I could work at home. A few days later I took out my cotton yarn, my hook and my phone. An hour later here is what I had!

I'm so excited now that I can do this. I plan to work more of these.

Another thing that I did for much of 2018 was to have a project that I could work on a little a couple times a week and have a finished object by the end of the week. For 2018 it was dishcloths. I finished more than there are in this picture.

I gave them all away as Christmas presents. For 2019 I have decided to make baby socks and am challenging all of you to do so as well. I have broken to working of a sock into 4 pieces and am working 2 socks at the same time from 2 different balls of yarn and on 2 different sets of needles. Here is a picture of the first pair. Below that you'll find all the info for my baby sock challenge.
Azariah's Baby Sock Challenge 2019
Socks are fun and can be as simple and mindless or as detailed and challenging as you would like.  I want to encourage everyone to at least try socks and so I have decided to have some fun and challenge you guys.

#azariahsbabysockchallenge
#azariahsbabysockchallenge(month abbreviation)

Make a pair of baby socks, socks that will fit someone a year old or younger, to give away, not sell.  Follow me on IG and tag your entry with the 2 # tags above.  The second one will change each month and that is how I will draw for prizes.  I will draw for the winner, using a random number generator on the 1st day of the following month and post the winning pair.  All entrants are subject to my discrection.  All rules of tagging and size must be followed to quailify.  Any baby sock pattern may be used for this challenge, tag the designer so they get credit too.  Prizes will be shipped any where in the world and will be different each month, but sock related.

The pattern I am using is this one, it is on page 39, worked on 2 circular needles and closed with Kitchner stitch.  I work it on 4 double pointed needles.  I will post my changes for that next week. This pattern takes about 30 yards of fingering or sock weight yarn and I am using US size 3 needles.

The final thing that I'll talk about that I did in 2018 was to always have a pair of idiot socks going. My birthday in 2017 I received a small backpack, again from my BFF's mom. I put a rivet in the side a run my yarn through it and the sock is in the outside pouch. I finished many pairs this way, always had something to do to kill time or stay focused during church. I will continue this but not always in my backpack sometimes in my rainbow colored alpaca bag from Slipped Stitch Studios. Never without needlework.


I thank you for taking the time to read what I write. I hope that it gives you some inspiration and ideas. Happy handwork and Happy New Year! May the Lord bless you in 2019.

Friday, December 14, 2018

Looking ahead to 2019

Each year I like to set some goals and write down ideas of some things I'd like to learn and implement in the next year.  I do some of this in October with my birthday and then I do A LOT as many do around this time of year, the end of one year and the start of another.  I do this in many areas of my life, some of which are faith, food and fiber.
For 2019 I would like to learn how to tablet weave and do bobbin lace.  I plan to start stashing all new fiber and yarn acquisitions on Ravelry.  I want to launch a fiber arts guild in eastern Colorado.  I have a list of designs I want to finish, currently in all different stages.  Then I have a list of projects I want to finish.  That's mostly what this post will be about.  Some of these projects were started long ago and some are waiting. I am also going to start carrying and sketch book and colored pencils so that I can capture ideas on the fly.

First of all I have this little piece here.  I only made it through round 20 and decided that the needles and yarn were too small, so I ripped it out.  Having recently finished that little doily, I'm not ready for something that small again yet.  It was a sample in preparation for a larger project that will be started on January 1, 2019.  It is part of a KAL with a Ravelry group called Herbert Niebling.  For more info on the group click here.  It has been ripped and put away.  Here is a picture of the new yarn for another sample doily on the left.

The yarn I have chosen for the larger piece that we start on New Year' is on the right..
I have never done any of Herbert's lace pieces before and am very much looking forward to this.

Back in August I started the Faberge shawl, 3 times, because it took that many times to get the cast on correct.  Well, I have to rip it out now.  I used the colors in the opposite places that I should have.  The brown should be the overlay and the variegated green the background.  So I will rip and then begin again.  Haven't decided when to restart yet.

My DH recently received a promotion and a raise.  He promised me a kit from June Cashmere.  On small business Saturday this year, June Cashmere offered a free pattern to those who bought yarn from their local yarn shop.  I took advantage of the opportunity and DH made good on his promise.  I bought 2 skeins of their lace weight in the curry colorway.  I got my download code from Longmont Yarn Shoppe and downloaded the Archa shawl pattern for free.  Thank you June Cashmere!  This one I plan on starting after I finish Christmas knitting; sort of a reward.  If I finish early enough and the children are still in school I can cast on at my favorite coffee shop too!

This will be the first year that I celebrate Roc day.  I will start spinning the remaining fiber from Chloe's lamb fleece for my surprise jacket, which I will then enter into the 2019 Make It With Wool Contest.  I have spun about 6oz of this fiber so far during Spinzilla 2018.  I have a long ways to go.

One design idea that I have that I'll share at the moment is to make a hooded cowl.  Much like what Arrow wears.  The yarn I currently have for that is a new one I bought at Piney Creek Yarn shop.

I have learned how warm wool, alpaca and yak really are.  I love my cowl, gloves and socks.  I have plans to make more things to keep warm.  I have a pair of color work mitts I started some time ago.  I really want to have a third color in them but am having trouble getting it in there the way I want.  I have found a website that I will do some more digging in and am hoping to achieve the look I want.  I want pink to be on only the flower.  I'll update here as that progresses.

I have plans for another cowl too.  I got some yarn over the weekend from Longmont Yarn Shoppe, I had a reward and some Bandit bucks to redeem, so I did.  It is 4 different colors of lace weight from Malabrigo.  It will be a ripple, with a bit of lace and a gradient look to it.

I will continue on the items that are currently wips such as diamonds and pearls, the wedding shawl and alpaca after dark.

In my final post this year I will look back on 2018 and show the larger finished projects, discuss the goals I had set and if I met them and show my favorite finished object for the year.

Thursday, November 29, 2018

Socks, Socks, Socks

I love knitting socks.  This hasn't always been the case.  The first adult sock that I knit, is a loner, no mate.  Big surprise.
I made a few mistakes, too small of needles and too thin of yarn, so the sock took forever!
My next disaster yielded a PAIR of socks.  Still wrong materials, but I still use these guys.  They are made of 100% merino wool, doesn't wear well at all.  I wore through one of the heels.  I recently decided to mend it and now I wear them for an hour or so after my pedicure and that's it. Merino
A few years ago some new neighbors moved in and the wife was a knitter!  Yea!  She loves to knit socks and felt I needed to knit them too.  So we picked out a wonderful pattern that I have used more than once, Owlie.
We knit them together, her right handed and me left, following the chart.  I chose smaller needles and more stitches, but they came out pretty much the same size.   Here are mine.  She didn't put hers on her Rav page and she has since moved so I can't get a picture of them.  She showed me that knitting socks is all about numbers, and they are easy numbers too, the same ones every time even.  Now I find a pattern or stitch I like and just plug it into my formula that fits me.

US size 1.5 needles
Finger weight yarn
Cast on 72 sts or close there of.
Work 12 rnds of cuff if one isn't written.
Work 60 rnds of pattern unless it is closer to a garter pattern, then it takes more rnds.
Work my heel flap across 36 sts, for 36 rows. I have recently learned eye of partridge and love it.
Work the gusset as written here.
Dec back down to 72 sts.
Work foot until I have a total of 60 rnds.
Work toe dec until the ere only 24 sts rem.
Kitchener closed.

This opened a door though.  We then joined the Tour de Sock and Sock Sniper the next year.  I then decided to be adventurous and try a pair of toe up socks.  The were given to a friend under going chemo at the time.  Stage 4 breast and ovarian cancer.  The Lord still has work for her here.  Here are the socks.  Not my favorite way to work.

I have since tried doing toe up socks again and I just don't get it.  I understand the knowing of having enough yarn for the foot and making a shorter leg if necessary.  My thought on that is the foot is the part in the shoe and not seen as publicly as the leg.  I'd rather have a longer leg, run short on yarn for the foot and have to make the toe in a different color.  Another way to avoid running short on yarn, especially for sock 2, is to divide the yarn that you have in half.  Wind each half into it's own ball, working one sock from each ball.  There are other advantages to this as well.  When you reach the hell of sock one, if you have another set of needles, you can start sock 2 and do the heel at a more convenient time.  Or just work both socks simultaneously.
The casting on for toe up is quick using Judy's magic cast on.  That I love.  It is very fiddly though until you have about 6 stitches on each needle, that's takes some time.
For me it has been hard to get a foot that fits working toe up socks.  My first try at the Port socks ended up ripped because the foot was too short.  Now I did do some math and my notes from cuff down and was able to get a foot that fit.  Having done all the work and knowing all my numbers for cuff down I don't see a benifit for me to change.  Here are the links to the final 2 Port socks projects, one done left handed and the other Portuguese knit.  Port 2a  Port 2b This pattern will be available in my Rav store soon.  One sock is worked from the cuff down and the other is worked from the toe up.  Both use the same charts.  It is a pattern I put together for a sock anatomy class I hope to teach soon.

Caring for socks is very easy to do if you put some thought in to the project first.  First of all think about who you are making them for and how they will wear them.  My mom and grandmother only wear theirs around the house and to bed.  I wear mine in my shoes, even my sneakers.  I know of one knitter's husband who wears his running every morning, for 5 miles.  She using Corridale yarn for those and they are holding up.
My mom loves the merino, cashmere, nylon base sock yarn.  She hand washes her and my grandmother's socks.  My favorite base is super-wash merino, nylon.  I throw all those in the washer AND dryer.  I do have a few of hand wash only pairs, before I knit socks like an addict.  For hand wash socks, alpaca, merino and other non super-wash blends, I fill a pot, sink or whatever is handy with warm water and some Eucalan no rinse soap.  I drop the socks in and swish gently as these are feltable fibers and not in the washer for a reason.  I leave them to soak until the water has cooled, then spin out the excess water and lay flat to dry.  To spin out the water you can use the washing machine set so that no water comes in or use a salad spinner.
So choose the fiber in the base with the recipient in mind, not only how they will wear them, but how much time it will take to care for them.
If they are for children, who's feet grow so quickly I don't even make then socks, then just make tubes with no heel.  Then they will fit a while longer.  I also do this for someone who's shoe size I don't know.

Speaking of heels, there are many heels out there that can be worked on most patterns.  The newest one I learned is the short row heel.  I may like it better than the heel flap I have been working for so long.  I haven't finished that pair of socks yet and therefore don't know how it will feel on my foot, but I know the knitting of it is very quick.
You can also do an after thought heel.  To do this, when you get to where the heel would be put in, pick up some scrap yarn and knit across what would be the heel stitches.  Re-knit those stitches in pattern using the sock yarn and continue on to finish the sock.  Then come back and pick up stitches on each side the scrap yarn.  Remove the scrap yarn so the you have live stitches for your heel.  Now work a decrease similar to that of the toe.  I don't like this one because it comes out too pointy.

Socks wear better when always worn on the same foot.  So how do you know which sock goes on which foot?  In my socks that go on the right foot I a small 7 stitch by 3 round purl section.  It makes a bump that can be seen by the eye but not felt by the foot.

This morning when I put my socks on I couldn't remember if they were a hand wash pair or not, they are but I had to look up the yarn,  In future when I knit socks from a hand wash yarn I will put another kind of mark on one of the socks so I know immediately.

I store my socks, rolled up in pairs in plastic, lidded totes.  Each of these totes holds a dozen pairs, please don't judge me.

I have been knitting socks like crazy since that wonderful neighbor got me hooked back in 2014.  I always have at least one pair on the needles if not more.  I don't have all of them on my Ravelry page, but most of them are there now since I have decided to post anything that takes a week or longer on my Rav page.  I was keeping all the little bits of yarn left over so that I could darn my socks.  Then when it came to it, I decided not to darn them.  I have so many new pairs to wear, why not rip out the worn socks and re-knit them into something new?  Now my little left over bits are going into a Stephen West shawl, I get the pleasure of not only the yarn, but the memory of that pair of socks.  Either who I made the socks for, where I was when I made them or places I have worn them to.  I'm excited about this.

I went to rip out my first 2 pairs of socks and it did not work. Boo!  The bottoms were so felted that ripping is going to be impossible.  So instead I have started a box to collect my socks that are beyond foot wear.  My idea now is to use them as pieces of fabric to make crazy cloth for other finished objects, like bags or hats maybe.  Still just an idea, but I am excited about it.


I'm not here to change anyone's mind, I just want to share my sock experience.  In hopes of getting everyone to at least TRY socks, for 2019 I am going to host #azariahsbabysockchallenge on Insta Gram.  Baby socks are smaller and faster than full grown socks.  They take small amounts of yarn and can be done in any color.  For the challenge I would like all socks to be either donated or gifted, but not sold.  My goal is to make a pair a week and then they will be donated to the Women's Resource Center in my area.  There are many free patterns available on Ravelry.  I will draw for a prize once a month.  Any other info will posted on my IG Azariahs1982 the end of December.  Yes I am copying what Yarnhoarder did with dishcloths, sorry.

Monday, November 19, 2018

Nijah's First Doll

This is the story of Nijah's first doll, 12 years later.
This doll was first made about 12 years ago for my daughter. She carried it around and loved it as you can see from the picture.  Hers is the one on the left.


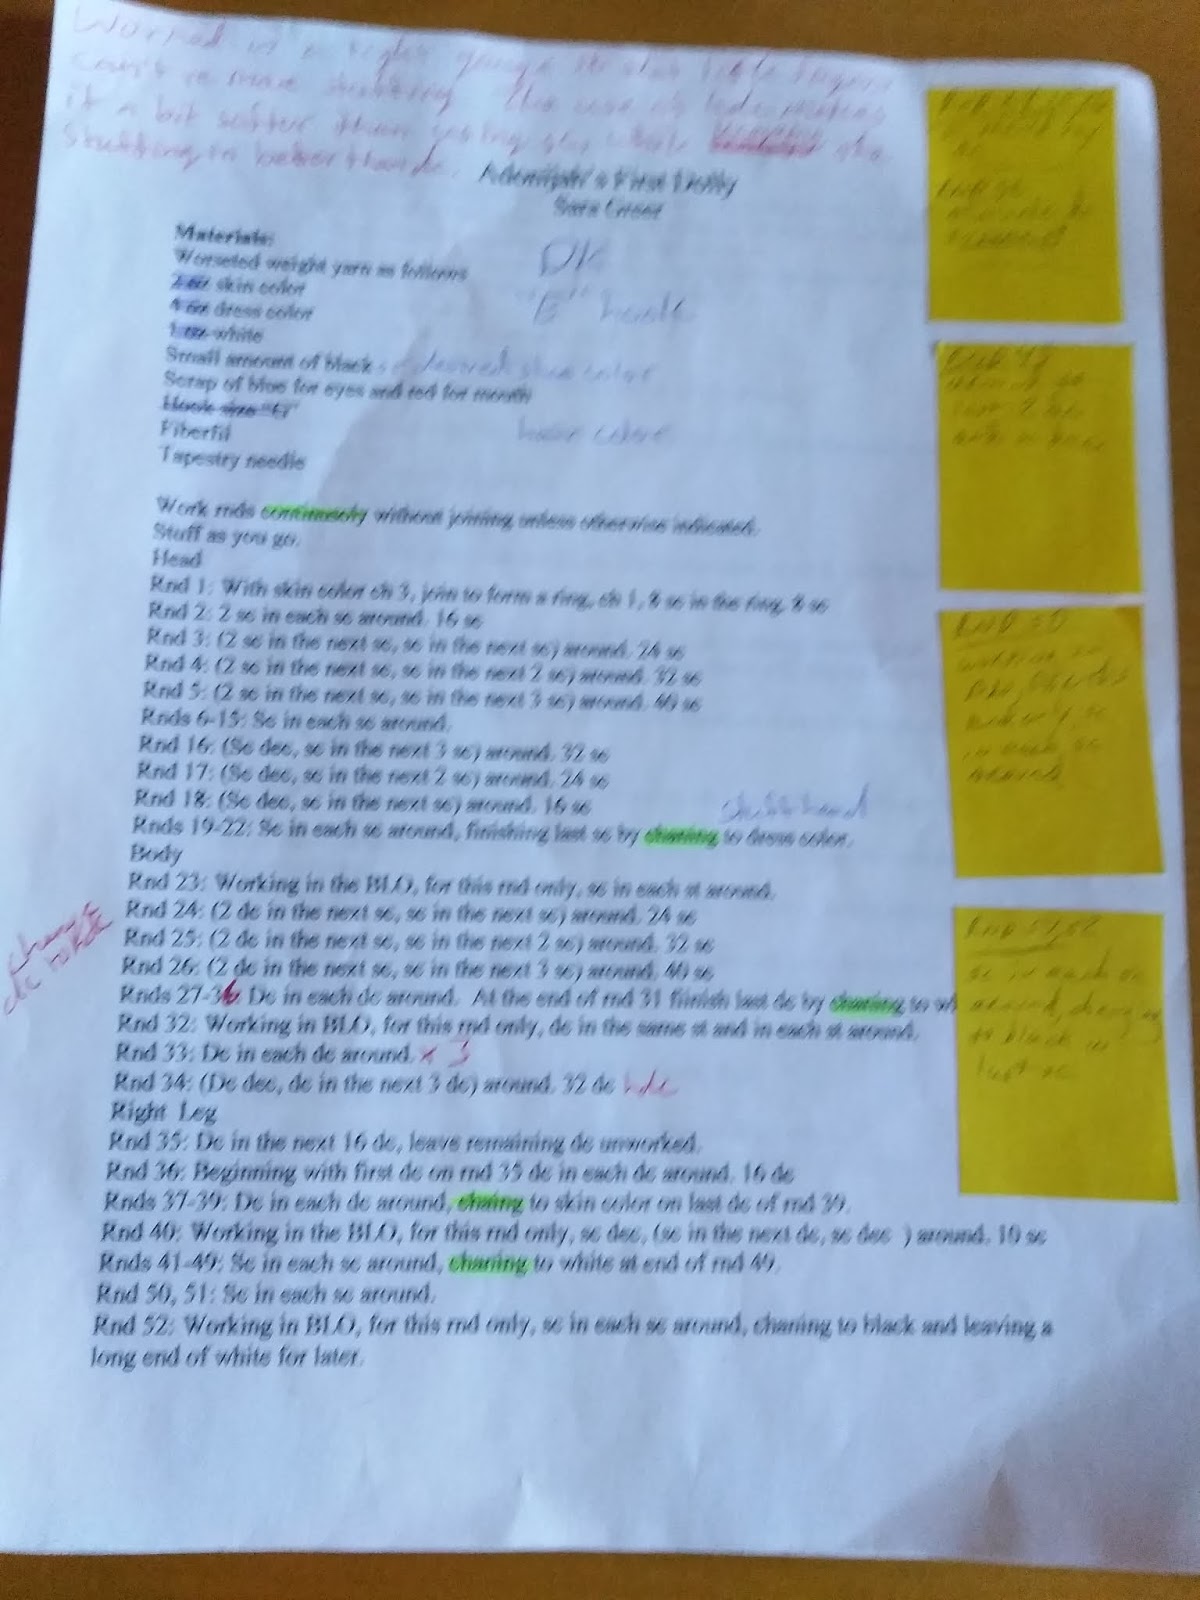
I was new at making toys, let alone designing them. My mom, who loves to crochet toys, proofed the directions for me and placed sticky notes, on the side with the corrections and some highlights to the actual text. These directions have been sitting on my desk for years, moved to another town and still sat on my desk. I finally got to them and found the doll too!

I decided that I would use the same basic idea but that some changes needed to be made. I used half double crochets on the new doll because the double crochets would let little fingers in to the stuffing.  I also used a smaller hook and lighter weight yarn.  This made for a smaller doll.

I also decided to go faceless for this new doll as Nijah ripped the face out of the original.  She was about a year old when I gave it to her and the recipient of the new doll is about 8 months old.

Both dolls are made from 100% acrylic yarn and stuffed with polyester fiberfil.

Here are the step by step directions to placing the hair on the doll.

First I cut lots and lots of strands.  Then I outline where I want hair.

I then insert the crochet hook where I want the next strand placed.

I fill in the area working from bottom to top and left to right.  Bottom to top is practical for the way the hair lays and placing new strands.  Left to right is preference.
I then fold a strand of yarn in half and wrap it around the crochet hook.
I then pull the strand through the stitch.
I then hook the 2 ends on the left around the hook and pull them through the loop I just made.
I then continue to pull the hook up and to the right, pulling the ends completely through the loop.  Then pull the ends tight to make the strand secure.

I continue these steps until all the hair is filled in.  It is time consuming, but I love the finished look.  It took me an entire movie to do her hair but I really like it.

Until next week, fiber on and Happy Thanksgiving!

Monday, November 12, 2018

Dying Cotton and Wool

Hello Everyone!
Wow, this week flew.  We lost our phone service and had no 911 for a while either.  We were living in the olden days.  What was nice about it is that I had no phone the night before and almost the entire election day.  Glad that's over...

So to dying.  I dyed some cotton t shirts for Cross County State Champs competion a couple of weekends ago.

The white shirt in the middle is what we started with.  I hate wearing white and my husband can't wear white as dirt finds him any where.  Our son, in the middle, was the one going to state, and can wear white without issue.  I dyed mine using the Jacquard's fiber reactive dyes.  I put the dye in some water in a large stainless steel pot.  I added the salt as directed on the back of the jar and later the washing soda.  The worst part of it is the stirring.  20 minutes constantly sat first.  Then I did every 10 minutes for about an hour to set the color.  Then into the washer it went.

The gray one I used Rit dye.  It works much the same way as the Jacquard's, except without adding anything other than water.  The stirring is for an entire hour though.  I made my hubby do that, it was his shirt after all.  Then it went into the washer with the purple shirt and then had a rinse in cold water.  I did dry them in the dryer as we had to wear them the next morning.  Dying cotton is fun and easy, it just takes more baby sitting than I like.  The sew threads in the shirt are made something else, probably nylon or rayon and didn't take the dye, so they are still white.

Remember safety, do NOT use the same tools for dying and for cooking.  You MUST use a different set for dying.

I also recently dyed some super wash wool yarn for a friends Christmas mitts.
Last year my BFF asked me to dye some yarn and make him some fingerless gloves that were the same color as a sweater I had knit many years ago.  I dug and dug and dug and couldn't find my notes on the dye recipe.  I finally found the names of the colors I used and started there.
I did 4 different samples and made notes of each.  I chose a sample for the gloves and dyed the yarn and made them.  When it came time for these mitts, a year later, I knew her favorite color was purple...  I had kept the samples and my notes!  This means that I can recreate any of these 4 colors!  I chose a color recipe and went to town.
I then wet out the fiber.  While it was soaking in the jar, I got out my dye solutions.

I discovered I was out of one color and needed to mix some more.  I make 1% solutions by mixing 5g of dye powder into 500mL of boiling water.  I use the metric system when dying because it makes calculating and replicating easier and faster.
I then mixed my dyes in another jar and added 60mL of vinegar.
I then poured the water in the yarn jar into the dye jar.  I didn't have to worry about felting because this is a superwash wool.  If it were a fine fiber such as yak or even alpaca I would have removed the yarn from the jar before pouring and not taken any chances.
I then put the yarn into the water and shoved it down.  The white near the center of the picture is the yarn in the dye jar.  If I had needed more water to cover the yarn I would have slowly added to it.
From here I have 3 choices for setting the dye.  Place the jar in a pot of water on the stove and slowly heating about 180F.  My favorite method is solar dying.  I would place a lid on this jar and put it outside first thing the morning where the sun will be for most of the day, but only if the weather were going to be 80F or warmer.  The way I set this particular jar of dye was the microwave.  For a jar this large, 32oz, I did 3 minutes heating, 3 minutes waiting, 3 times for a total of 9 minutes heating.  I then leave it to cool in the microwave for about 4-6 hours, or over night.

After leaving the dye to sit and cool until after I picked up the children from school, I removed the yarn from the jar and rinsed it with water of the same temperature. Again because this is super-wash wool I could just run it under the running tap. If it were almost any other fiber I would have filled another vessel with water and carefully swished it in there.

Unless you have used an excessive amount of dye, or used either a blue or fuchsia, then the water in the dye vessel should be clear and the yarn rinse clear rather quickly. Blue and fuchsia don't always exhaust well, be it Kool-Aid or an acid dye company.
Most acid dyes are safe enough to go down the drain, but check the label first! I pour both my Kool-Aid and Jacquard's down the drain. We live on a septic tank and have had no problems with me doing this over the last 6 years.
I store my 1% solutions in Zip-Lock bowls, on a shelf in my basement dye studio. There is no heat in there and the bowls are stores on against a foundation wall. I moved many of them here with me 6 years ago and they still dye and set like they did when I first mixed them.

Store dyes out of reach of children and pets. There is even an MSDS available for some dyes and that should be posted if you have those dyes. In this picture you can see my bowls stacked up in the back, my jars of powders in the front and the color chart to the left. This shelf is eye level to me at 5' 8" and is made out of metal. You will want the dyes on a shelf with few or no holes and made of an easy to clean surface such as metal or melamine.
If a spill does occur as seen in the photo here...

It is easy to clean up. Soak up as much dye as you can using a paper towel, do not wipe. Then using a cleaning rag, baking soda and hot water, scrub off the remaining dye

This will also work if you get any on your hands and you didn't wear gloves.

The safety directions tell you to wear gloves for a reason. These are acid dyes to be used on protein fibers and therefore will stick to protein. What are we? Protein. I personally don't wear gloves as I don't dye daily. If your exposure is higher because you dye often wear gloves, save your self. Also be sure to follow any other safety precautions listed on the jar or company website.
If the safety precautions and directions are followed it can be great fun to dye. If you want to be able to reproduce your results keep good notes.
When I make a color sample I used 1g of yarn and measure in drops. When working with 1% solutions, I use 1mL of dye to 1g of fiber. More for a more intense color and less for a paler color. 1mL has about 24 drops in it. I use a dropper that holds 1mL and get drops from it. It is slow and tedious but I was able to replicate my results. For example for this purple I needed 16 drops of one color and 8 drops of the other color. I was dying 100g of yarn so I multiplied each of those numbers by 100. That told me how many drops I needed of each color. That would take simply forever so I then divided that number by 24 and that result is the number of mL I needed of each color. Much better.
In my next post about dying I will walk through making a color sample spectrum and the measuring tools I use for dying.
Next week will be about Glory's First Doll. Until then fiber on.


Monday, November 5, 2018

Make It With Wool and a few other things...

As promised here are the results from the Colorado Make It With Wool 2018 contest.

Glory and I started out early, 0545 am on our way to the Adams County Fair grounds in Brighton, Colorado.  I was about a 2 hour trek from Deer Trail and it was raining.  Thankfully we made it to the pavement before the dirt road became muddy.  There were breakfast pastries and juice awaiting our arrival.
We were ready.  The others arrived and Gloria gave us the run down for the morning.  Get dressed and while you wait your turn for judging please work on the puzzle and take the sheep test.  I learned a lot from the sheep test and the puzzle was of gummy bears which we all received a packet of.
Here is Glory all ready for judging.  She had a low number so got to be done quickly, but she did have to go in front of ALL the judges because she entered a knitted piece.

I got ready and was in the middle of a pack of 12 ladies.  Talking to the judges was so much easier this year.  I don't have a picture of just me in my outfit, but here is one of both of us in front of the restaurant, Senior Ric's in Aurora.
Neither of us placed to go to Nationals.  I did get 3rd in my group and was top knitter.  We received some great flowers and gift certificates for participating.  As top knitter I received a $25 gift certificate to Shuttles, Spindles and Skeins in Boulder.  I plan to go there later this month.  Look at this rose, isn't it amazing!
These last 2 weeks I completed my sweater, the leg warmers in the picture, 2 dishcloths, socks, did some dying and killing.  I will go step by step through the killing processing that I did, but I am going to save everything else for future posts.

Killing is the process for blocking acrylic items.
You will need either a steam iron or garment steamer, blocking surface, tape measure and rust proof pins.
Spread out the item on the blocking surface and pin if needed into the desired finished size and shape.
This is a finished blanket that one of the ladies in my crochet group asked me to finish for her.  I decided it needed killed before I did the embroidery.  I have spread it out on my blocking surface, which is a child's play mat covered with a sheet.

Here is a shot of my steamer on the stool so that the hose can reach farther.
Do NOT touch the piece with the iron or steamer as it could burn it.  After you have passed over a section do NOT touch it at all as you could squish it completely.  Acrylic is a type of plastic, so killing partially melts the fiber into its new shape and as it cools it will stay forever; even after washing.  I did wash this piece before I began, because any dirt on it when you kill could become permanent,

Here you can see how close I am to the surface of the blanket but not touching it.
After you have steamed the piece, leave it to cool for at least an hour.  It can then be handled and used.  Killing often makes even the softest yarns even softer.

Here are some pictures of the shark blanket I finished a couple of weeks ago.  H Bomb was much happier to pose for this than the unicorn.


I have started to crochet a doll, which I am proofing the pattern for as I go.  I have also started Robbie's gloves for his birthday, again another pattern and tomorrow I'm hoping to jump full into Mom's birthday shawl.  Yes maybe another pattern.  It has a symbol in it that is possibly copyrighted and I'm not sure what to do with it, we'll see.

In my next post I will share about dying, both wool and cotton.  In the wool dying I will be discussing how to use acid dyes, make notes and get repeatable results.

Happy Stitching!