Monday, September 10, 2018

To the Left to the Right to the Chart

    I am a left handed knitter.  A true left handed knitter.  This used to be a HUGE problem.  Now it is something that I am aware of and only occasionally causes minor set backs.  I am a left handed knitter because I was first a right handed crocheter.  I had to teach my self to knit, because no one else in my family did and I didn't yet know what a yarn store was so...  I found a book at Hobby Lobby that teaches crochet, knitting, tatting and embroidery.  I started with the right handed directions and just couldn't get the yarn to cooperate in my right hand, so I turned the page and the yarn was tensioned on the left hand, like when I crochet!  Yea!

These instructions, unbeknownst to me were true left handed knitter instructions.  I started knitting baby clothes and blankets.  All is well.  I found a local knitting group to get help when I messed up and slowly learned how to correct my mistakes and that there is more than one way to cast on.  I learned to yo properly and then work it correctly on the return row, all was going well, until...
The "KISS" dishcloth.  During this time I had taught my mom to knit, true left handed as well.  She found a knitting community on line as she worked full time and couldn't go to the community group I attended.  One was a weekly dishcloth.  I really liked this "KISS" dishcloth and so I made it.  Can you guess what happened?  The word was backwards!  I was so surprised and confused.  Perfectly backwards.  How in the world did I manage that?  I moved on and avoided things with words.  Most pictures were find because if they turn out backwards it's usually okay.
A yarn store opened not too far from the house and they were offering a lace knitting class.  I was interested in lace and so I signed up.  When I arrived we were handed charts.  I had never seen a knitting chart before and was interested.  This could be faster than all the letters and numbers. Will the leftiness be an issue?  I followed the chart exactly as the instructor told us to.  Stitching from the number to the left on the public side and from the number to the right on the return.  When we returned two weeks later to finish our fichu, small shawl, mine looked just like everyone else's!  I was excited but also confused.  I asked the instructor why "when I knit opposite of everyone does mine look the same?"  I explained about the "KISS" cloth and she was at a total loss and couldn't help.
Now I was on a mission to learn more lace, as I loved it, but I needed to know why it worked.  I found a group online that was lace knitters and they were just about to to start a new KAL.  It was a fairly basic piece and one motif would be released each week.  This would give me the opportunity I needed to experiment.  That's exactly what I did.  My finished piece can be viewed here.  I refer to this piece as my knitting identity crisis.  I learned so much.  I am still "poor thing" a true left handed knitter.  I just work everything the opposite of what it should be.  Those charts, I start on the side without the number and work towards it.  If it is written I choose if I should chart it and then work it or is it symmetrical?  If it is symmetrical then I can work it as written.  That's why that first little lace shawl worked out, it was a symmetrical pattern.  I can now decrease, increase and cable correctly.  It has been well worth the effort.  I have learned to continental knit as well as Portuguese knit.  I can knit right handed it is just very slow; helpful for teaching though.
For the purpose of this blog post I true left hand knitted a dishcloth with a picture of a cowboy boot on it.  I then knitted the same dishcloth, from the exact same directions Portuguese style, right handed.  You see the results below.

If this pattern had been charted to begin with they would have both come out facing the same direction and the mistakes I found in the written pattern would have also been caught before publishing.  It would also all fit on one page instead of two.
Charts are becoming ever more popular for knitters to use.  Don't be afraid of them, they can be your friend.  As with anything it will take a little time and effort.  I know that charts are not practical for every pattern but they are helpful in most patterns, even if it is just showing the stitch pattern.  In a garment where there is a lot of increasing or decreasing, the making of a chart can be difficult and the reading of that chart is slow as well.
I recently knit these mitts from Hunter Hammersen.  Purportedly. pattern here

I enjoyed them very much and will make them again.  I worked them left handed and the twists of my over lay are the opposite direction of hers.  The increasing in the palm is worked differently for each hand so that the mitt is only for wither the left or the right.  I follow the directions for the right hand and that is my left hand mitt and vice versa.  Like I said some trial and error but not bad.

This tiny lace doily was knit from written instructions, but I knew from the pictures that it was a symmetrical pattern.  The only issue is when the pattern said to move one stitch from the left to the right at the beginning of a round, I did it the opposite direction at the end of the round.  Then worked the crocheted bind off right handed.
I am figuring that I was supposed to be left handed in life, I am not.  When I pick up a new skill that I have never done before, it is most often done left handed.  I taught my mom and my sister to knit.  They are also both true left handed knitters.  My mom works mostly with charts and makes lots of socks.  My sister doesn't often knit any more as she homes schools three young children.  I have now taught my daughter to knit, with whom I was pregnant when I learned to knit.  She is a lefty in life, who knits right handed continental and crochets left handed, go figure.  I have come a long way in the last fourteen years, since I first learned to knit.  The group I went to for help, I now help them.  It has come full circle.  Knitting is a skill that can be as complicated or as simple as you'd like.  I enjoy working with multiple charts, tiny needles and fine thread to make a complicated lace piece, but larger needles, fat yarn and garter stitch have their place too.  How ever you knit, enjoy it!

Tuesday, September 4, 2018

One Hump or Two?


Welcome to my first monthly segment.  My goal is to put up a new post each Monday, with the following schedule.  The first Monday of each month will focus on spinning, the second on knitting, the third on weaving and the fourth on crocheting.  The months that there are five Mondays the fifth Monday will be about dying.
This week is about spinning and the fiber in the spot light this month is camel.  I have worked with camel only in a blend.  My first was with merino, then silk and most recently with "fine wool",  That was all the package said.
    The first two blends were 50/50 and the one with fine wool was 84/16, with camel being the lower.  I spun the merino and silk blends on a low whorl 19g suspended spindle.  I spun the fine wool blend on my 1978 Ashford Traditional.  Both tools worked well for the yarns I spun.
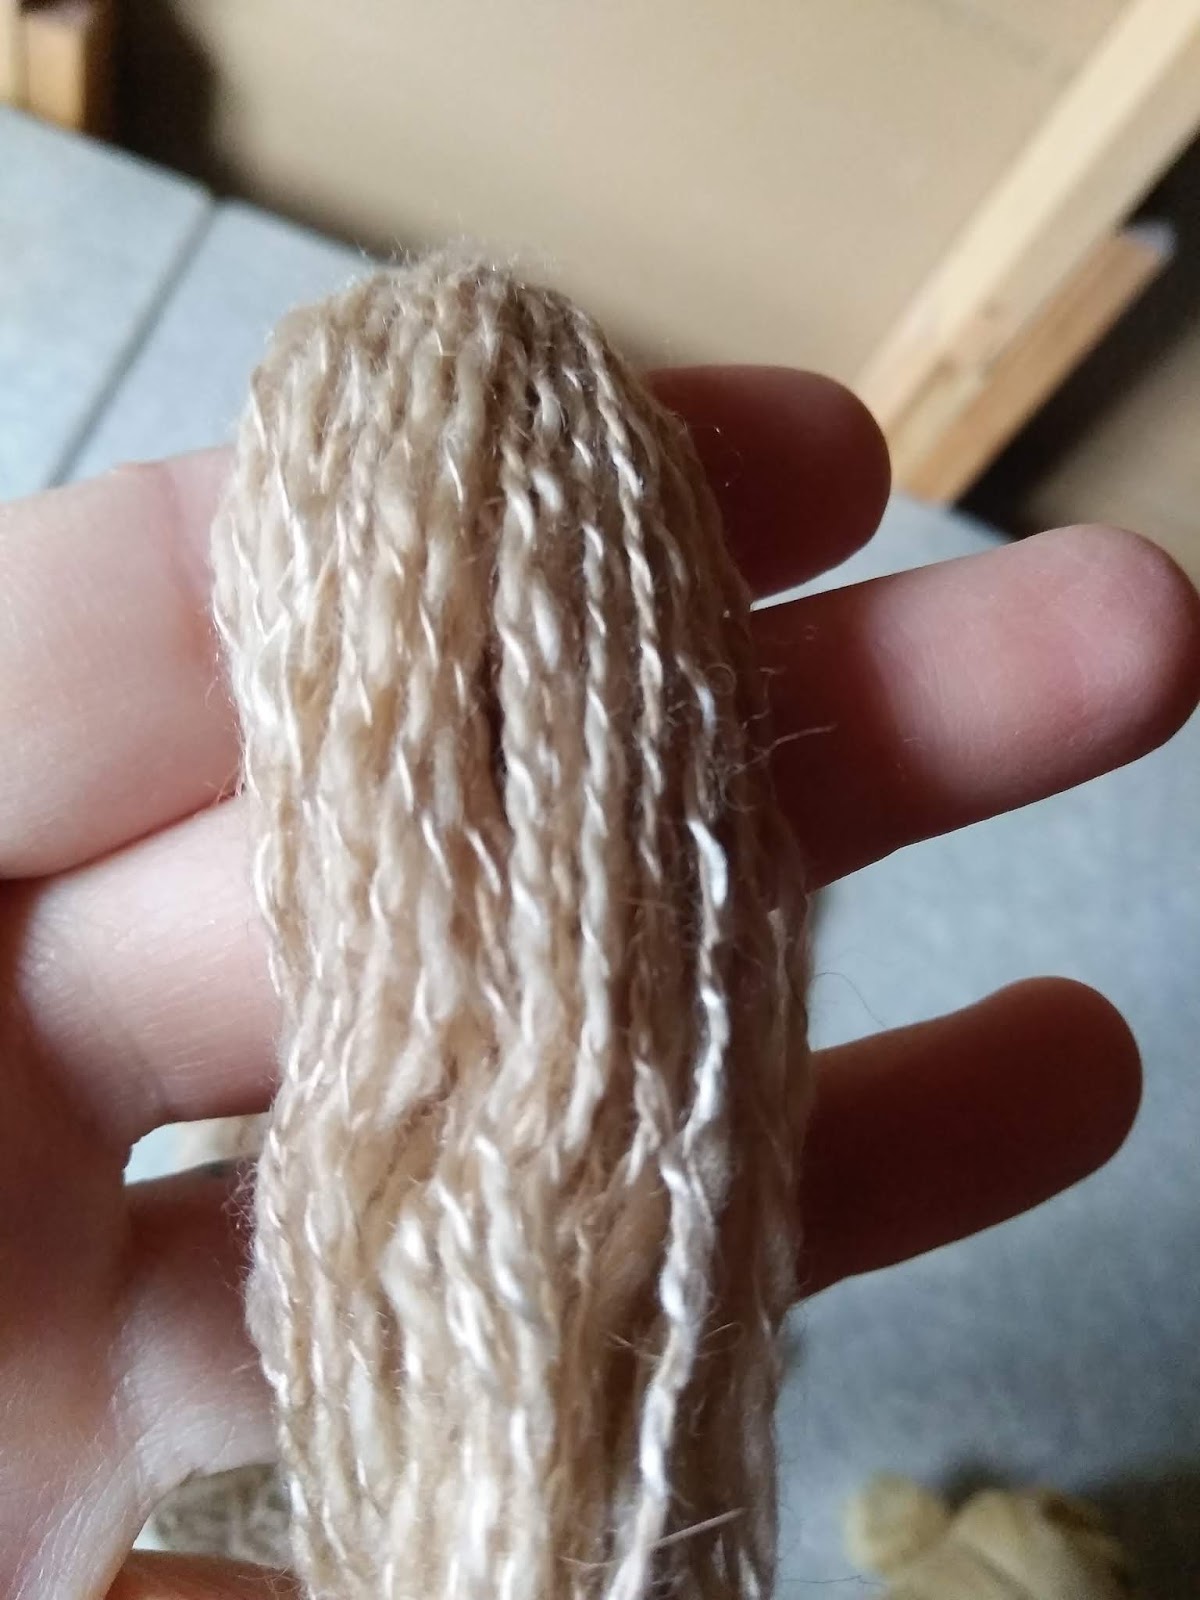
I bought both rovings at a store in Black Forest that is now closed, called Table Rock Llamas.  Both of the rovings were natural color.  Even though I bought the same number of ounces of each roving, I didn't get the same number of yards and had some of the silk blend left over.  I'm not sure why this is as I should have run out of the silk blend first because silk weighs heavier and should have made less yardage.  The merino and silk blends were plied together.  They are 24 wpi as a 2 ply yarn and the singles are 32 wpi.


The fine wool blend was plied with another fine wool yarn from the same vendor, The Natural Twist.  I had two different colors of this fiber, Guinevere which is a shade of rose and Merlin which is a shade of forest green; the name of the fiber is Camelot.  I love it.  The single of the Camelot was 30 wpi and the single of the fine wool was 36 wpi.  Plied together they were 20 wpi.  I used these yarns to weave a plaid scarf for me to wear this coming winter, look for more on the scarf in my weaving installment coming in a couple weeks.

There are two different kinds of camels, one hump, Dromedary and two humps, Bactrian.  Dromedary camels live mostly in hotter regions in northern Africa and the Middle East, because of this they do not produce as much fiber as the Bactrian camel.  Dromedary camels have one hump that stores fat, not water, that they can use to survive the harsh desert life they live.  They can go for extended periods of time without though.  Some cultures keep these camels for milk, meat, transportation and fiber.  They can produce about 7 pounds of down a year if the weather permits.  Bactrian camels live wild in Gobi desert and can drink salt water.  Their domestic counter parts cannot.  These camels are where most spinning camel fiber comes from.  They live in a colder area and produce more down.  They are also used for transportation.  The wild Bactrians are endangered and the Chinese government is trying to fix that.
Camels have five coats.  The fine one that we really enjoy spinning is the down under coat that keeps them warm.  The outer four coats keep the sun and dirt out.  These coats can be used for more utilitarian applications such as rugs and yurt covers or woven for tie downs and leads.  The down coat is shed once a year by the animal and can be collected.  This may yield a fleece weighing from 5-15 pounds, depending on the size of the animal.  The staple length of this fiber is from 1-5" and has a micron count of 19-24 for the adults and the babies can be as fine as 16 microns.
Camel down takes dye well, though I haven't dyed any personally, I have seen it in many different color colors.  It doesn't felt easily however and must be blended to be felted.

I have also been trying to finish up some fiber that I started spinning during Spinzilla last year.  It is from Ancient Treasures Alpacas in Arvada, Colorado.  It is 80% huacaya alpaca and 20% tussah silk.  It takes a bit of playing with to get it going, but then it's like butter.  It also likes to fly away in this dry climate and I have found it sticking to everything.  I have 4oz total.  I will spin two bobbins with 2oz each, but I haven't decided if I want to ply them together or ply it with a 50/50 yak/silk blend.  I would need more yak blend if so.  I bought the yak/silk blend from Blazing Star Alpacas.  Their fiber shop is in the back of a vacuum store in Englewood, Colorado, while their alpacas are boarded at a ranch in Elizabeth, Colorado.  The yak/silk blend is from Ashland Bay.  I am spinning both of these fibers on my 1978 Ashford Traditional replica using an 18:1 ratio.


I have been doing demos at the DeLaney farm in Aurora, Colorado lately,  I have been taking my original 1978 Ashford Traditional wheel and to show spinning with wool.  I am using a 9:1 ratio and spinning a bit thicker.  I also bring a low whorl suspended spindle, the same one I spun the camel blends on, and am spinning some BFL from Greenwood fiber works in the meteor color way.


    I spin each Sunday before church starts.  I use a tiny 9g Turkish spindle my husband made and some green fiber from Redfish dyeworks.  It is a 50/50 merino/silk blend that I have been spinning on for quite sometime...  I do this while walking around and talking to people.  It is a very small church so this is easy to do.  It is also a great conversation starter for people of all ages, as I would otherwise be shy and really have to force myself to talk to others.


I haven't been working on any new skills really.  Just trying to keep my fiber consistency and drafting the same.  I recently was asked to spin a 2 ply DK weight yarn.  I knew this was going to take some practice and figuring out because it is not my default spin and I have never done a 2 ply DK before.  I was given Shetland roving to craft this yarn.  I was spinning along and using my gauge got a single that should make a nice DK when plied.  I spun a bit more to make a ply back sample and it was great.  I hit the target.  I will say it did take about a week's worth of trail and error.
    I finally have enough spun to start the project.  I begin knitting and notice that the yarn is a bit thicker than I expected and while the gauge is close to what is listed in the pattern, it is much tighter knit.  I continue on, not sure why all this is or what is happening.  I finish the spinning and knitting nd turn the project in the beginning of this past April.  I finally realized what happened literally just last week!  I didn't have enough twist in my singles and when they were plied together they became fluffy.  Because I only checked the grist of my ply back samples I didn't know the yarn that I was plying wasn't the same until I started knitting.
    Lesson number one, a ply back sample is a good starting point, but for a final yarn, making an actual sample will give you A LOT more information.
Lesson number two, if you want a fluffier finished yarn, use less twist in the singles and they will fluff more when plied.
    Lesson number three, find another spinner who had been doing it longer than you and ask their thoughts when you are getting unexpected results.  I didn't do this.  I know very few other spinners and most of them I have taught.  The only reason this finally all fell into place is because of the Sheep to Shawl competition I was part of in June and because I sit around think too much.  I knew I was having trouble getting enough twist for the Sheep to Shawl team because we were using wpi and twist angle.  I won't even pretend to understand twist angle, but I learned enough to use it for this competition and that's what told me I needed more twist.  Last week I was thinking about that Shetland DK yarn again and it just suddenly all fell together.  I don't like to spin by the numbers so speak as we did for the competition.  I understand in that situation that you almost have to, to get a nice finished piece.  We did take first place.  I prefer to spin by the feel and use wpi to get me in the ball park.  I think though I need to spend some more time with twist angle and figure out how I can use it.

Thursday, February 22, 2018

Processing Chloe's Lamb Fleece

I currently have 4 sheep in my little flock. 2 ewes who are half sisters, one is a Shetland Rambouillet cross, the other a Navajo Churro Rambouillet cross.
I was blessed to be offered a lamb ram that is a Leister Longwool last year. He and my Churro cross combined and now I have another ram lamb.
He was rejected by his mother and we have bottle fed him. He is almost 3 weeks old and doing well.

Here is a picture of everyone resting out in the pen during some recent warm weather.


The Shetland cross was my first ewe. I got her when she was about 3 months old. She is spoiled like a dog. She comes when you call her name to be petted and get treats.


In this segment I will be talking about processing her lamb fleece. The fleece from her first shearing.


I currently wash all sheep fleece in Dawn Dish soap and the hottest tap water I have. I buy the mesh laundry bags for delicates that have a zip top and I put 8 oz of raw skirted wool into the bag. I wash three or four bags in each load. Have a stainless steel double sink, each sink holds about 3 gallons of water and I use a cup and a half of Dawn dish soap for each load. I do  one wash and then I follow that with three rinses, each one getting colder and colder in temperature.

Before I wash I skirt the fleece and remove as much unwanted junk as possible. There is a lot of vm in my sheeps' fleece as we don't coat them. I love to see them and their beautiful colors, though I know coating makes a huge difference in a fleece. If you have the choice, get a coated fleece.

After skirting, washing and drying I sort again. For Chloe I sorted to remove more vm and to sort the fleece by color. I will sort by coarseness as I pick if I feel or see a difference the locks. Now it is time to pick. I have a large Super Glide picker that I love. I did put Chloe's fleece through it, but it didn't get as open as I'dlike and there is still more vm. I am picking by hand now to remove sticks, hay, seeds and such. My tool of choice to open the locks, a dog comb I picked up at the dollar store.

Here is an unpick lock.


Here is that same lock after picking and combing with the comb.


Next I will card this fiber and pull if off the drum carder as roving. I plan to make myself an EZ Surprise Jacket from the yarn I'm going to spin.

Until next time...
Enjoy your fiber!

Monday, February 12, 2018

Azariah an Origin Story

This post is how I choose the name Azariah for my fiber arts name and the stroy of the longest wip I have ever had.

In early 2009 we learned we we're pregnant with our 4th child. As usually goes for my husband and I, we had a name very quickly. The difference this time was we had a middle name for a girl and a boy and so didn't know what the baby was.

Azariah Floyd
Azariah Rose Makayluh

Not too long after we shared our exciting news with family and friends, I started getting sick. I was in my 2nd trimester and this was unusual for me. I went to my appointment and they couldn't find the heart and decided to do an ultrasound. The ultrasound showed that there was a baby, but no heart beat. We were heart broken.

We had begun setting up the house for our new arrival and I had started collecting cute things that were unisex of course.

I had also started to knit a baby blanket.

All the cute things, as well as the blanket, yarn and needles went into a box. I added cards as they came and my shirt from the March of Dimes event the next year.

To keep the memory of this baby alive, we decided to go with Azariah Floyd, I decided to make that my Ravelry name.

At the time most of my work was being donated.  Moslty to the hospital where my boys were born. I designed and knit or crocheted bereavement clothes for tiny tiny babies.  This would give families the opportunity to have a nice picture of a baby they lost.  I had be doing this ministry for 6 years before my loss.

About a year later I learned about knitted and could no longer make the tiny items to gauge. So I took it as the Lord moving me on.  Move on I have. I spin, dye, design, knit, crochrt, weave, design and teach. We moved to the county to have fiber animals and I have learned to really cook and can.

A couple of weeks ago at church one of the pastors announced that he had become a grandfather. The baby boy's name is Azariah. The Lord it's time. I took that box down from it's high self and with eyes closed removed the blanket and yarn.  Over the next two weeks I finished that blanket, for Azariah. I will be giving it to him this Wednesday night at church.


Saturday, January 27, 2018

Kokoleka update

After some thought and a little advice from a good book, I have decided to put Kokoleka on hold for a while.
I recently read about a designer who plans her designs about a year out. That made me feel so much better about the designs that I have languishing on the shelf.  Designs that are cast on and begun as well as swatched and waiting to be cast on. With this in mind and my publishing plans already in place for 2018, I decided to go to the shelf and get started on the knitting for 2019's publishing.
These pieces are timeless shawls and blankets.  Mitts, cowls and scarves can't always wait around that long, they may not be in fashion any longer.
I will continue work on smaller pieces as well, for publishing when they are finished.
This decision has been very freeing in many ways.  I no longer feel guilty for the pieces waiting and also don't feel pressured "to get it done NOW!"
I'm hoping this will let the creativity flow a bit better as well.
When Kokoleka returns it will be with the original idea of sharing step by step the design process.
In the mean while I will share pictures and updates on the pieces I'm currently working on as well as up coming publications.
Speaking of which, "Hex" is now live in my Ravelry shop. Here is a picture of the finished piece. It is a crocheted motif blanket that is joined as you go.  There are pictures in the pattern to help you along the way.


Here's a link to the pattern. Hex

Keep those needles stitching. Until next time...

Tuesday, November 28, 2017

Kokoleka

This post for Kokoleka will be covering the edging and how I got to the design choices I did.


The top needle is a US 00 needle. The nupps are too far apart and the stitches are too open. When I swatched using larger needles and yarn to make the work go faster I really like the way it turned out.


As you can see by the picture with the brown and white, working with the smaller needles and thread I was not getting the same results. Also I'm not really sure what I was thinking because working nupps in darker colors you lose the nupps. When I was working the nupps they were  also time consuming because of the smaller thread and needles. I do like the way they look as singles and will probably put them into the design somewhere else but knew that clustering them as I did in the pink swatch, was not going to work. So back to the drawing board we went.


The new edghing design is completely open and lacy. It goes quick and I really like it. Believe it or not, it takes more thread and than the nupps did. I was able to rip out the work that I had done and didn't like, because it is 100% silk it's slick and it is easy to rip, and when I reknit it, I didn't get as far as I had when I was working the original design.

As I am working on Christmas presents and getting ready for the holidays with children being home, baking, cooking and decorating I have not had any time to work on Kokoleka. Because of that this will be the last update on Kokoleka until February, when I hope to have more work done on it and something to show.

Merry Christmas and Happy New year!

Monday, November 27, 2017

It's Killin' Time

For each square a minimum of two ends have to be put in and then each one must be "killed" individually.  I can't stack them wet the way Franklin did for his because mine are made out of acrylic they have to be killed.
The process of killing requires a blocking surface, pins and steam, either from a hot steam iron or from a garment steamer.  I prefer the latter as it is easier on the hands to hold for an extended period of time.
First of all pin out the object to be killed.  Dry.  Do NOT soak it or mist it, this process is for synthetic fibers and synthetic blends.  Lightly stretch the piece to the desired size, unless it is lace then go for it.  The squares for Epiphany will be gently blocked to 6" x 6".
I pinned each corner and then the middle of each side. Now steam the piece by holding the steamer just above the surface.  Don't touch the piece as you are melting the fibers and touching the piece will squish it into a mess.  Because the steam melts the fibers don't hover too much in one area, the fibers can completely melt and break apart; ask me how I know.  Let the piece cool completely, about 30 minutes and then unpin.  You are now ready to start whipping.  Franklin showed it the best I've ever seen.
This link also shows his inventive blocking method.
Whip it good!